How to Fix Stunted Vegetable Plants in 5 Steps
Few things deflate a gardener faster than walking out to the beds expecting a harvest and finding pea pods the size of a fingernail, cabbages that fit in your palm, and carrots that look like pencil stubs. I’ve stood over that exact disappointment more than once. The good news is that stunted vegetable plants almost always trace back to one of five fixable things — water, nutrients, temperature, mulch, or pests — and once you learn to read which one is holding your crops back, turning the season around is usually simpler than you’d think. Let me walk you through how I sort it out, and the small changes that get plants growing again.
As an Amazon Associate, Backyard Superstar earns from qualifying purchases at no extra cost to you.
Start by Reading What the Plant Is Telling You
Before you reach for a bag of fertilizer — which is what most of us do first — take ten minutes to actually read the bed. Vegetables work hard to make fruit and roots, and they’ll show you exactly where they’re short. Yellowing lower leaves usually means nitrogen is running low. Flowers that drop before setting fruit often point to heat stress or thirsty roots. Pale, slow growth across the whole bed can be a sign the soil has simply run out of steam after a couple of seasons.
Walk the plot and use your hands. Is the topsoil hardened into a crust? Is the mulch matted and dry? Are weeds crowding the seedlings, or is there a soggy low spot where the soil never quite drains? I sink a finger two inches down to feel whether the root zone is moist or bone dry, because the surface lies — it can look dusty on top while staying wet underneath, or the reverse.
Two inexpensive tools take the guesswork out of this. A simple soil test kit like the Luster Leaf Rapitest Soil Test Kit (budget range, $) checks pH plus nitrogen, phosphorus, and potassium in a few minutes, so you stop guessing at what’s missing. And a little XLUX Soil Moisture Meter (budget range, $) tells you whether that root zone is actually dry or just dry on top — which, as you’ll see, is the single most common reason vegetables sulk. With those two readings in hand, the right fix usually picks itself.
Fix 1: Even Out Your Watering
If I had to bet on one cause of stunted vegetable plants, it would be inconsistent water. Both extremes do damage: a long dry spell leaves you with tiny pods and stubby roots, while standing water starves roots of oxygen and invites rot and cracking. Seedlings can die before they ever establish, and even mature plants stall when the moisture seesaws up and down.
What vegetables want is steady, even moisture — not a daily splash, but a deep soak that wets the whole root zone and then a chance for the top inch or two to dry before the next drink. Warm-season crops like tomatoes, peppers, and squash are especially happy with that slow-and-deep rhythm from spring through fall. The way to deliver it reliably is to take your own forgetfulness out of the equation.
For a whole bed, my favorite low-effort fix is a flat soaker hose snaked along the rows. The Rocky Mountain Goods Flat Soaker Hose (budget range, $) weeps water slowly along its whole length, so it soaks the soil at the roots instead of wetting the leaves — which also helps keep fungal trouble down. If you’d rather not think about it at all, an automatic drip kit on a timer is worth every penny. The Raindrip Automatic Watering Kit (mid range, $$) runs thin tubing to individual plants and waters them on a schedule, so a hot afternoon while you’re away doesn’t undo a month of growth. Pair either one with that moisture meter for the first couple of weeks and you’ll quickly learn your beds’ real rhythm.
One caution from experience: more water isn’t automatically better. Overwatering swells leafy growth on squash and cucumbers but can wash out flavor in peppers and turn eggplant mushy, and soggy soil is its own kind of stress. Match the water to the plant and the stage — ease off the heavy drinks once fruit has set — and let the top of the soil dry slightly between waterings. A rain barrel under a downspout is a nice bonus here, giving you a gentle, chlorine-free supply for the days you do water by hand.
Fix 2: Feed the Soil, Not Just the Plant
When growth is pale and slow, the soil itself is often the problem. Vegetables lean hard on three nutrients: nitrogen drives leafy growth, phosphorus fuels flowers and fruit set, and potassium builds sturdy stems and helps fruit ripen. Run low on any of them and you get vines that climb but barely pod, or peppers that flower and then drop those flowers before a single chili forms.
My first move is always compost, not a quick chemical hit. A one-inch layer of well-rotted compost worked over the bed in early spring, and again after a midseason harvest, feeds plants gradually and — just as importantly — keeps the soil loose and full of the earthworms and microbes that make nutrients available in the first place. If you’re starting a new bed from scratch, getting the base mix right matters even more; my guide to the best soil for raised garden beds covers the blend I use.
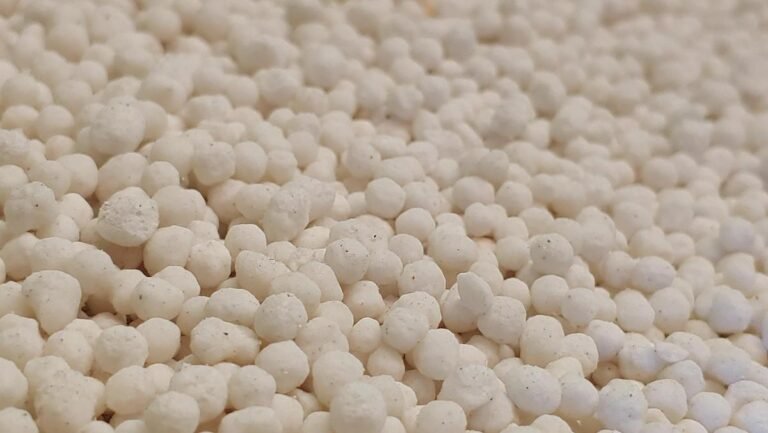
This is where that soil test earns its keep. If the kit shows you’re genuinely short on something, you can correct it on purpose instead of dumping on a general fertilizer and hoping. For edible beds I reach for an organic granular blend like Jobe’s Organics Vegetable & Tomato Fertilizer (mid range, $$), which feeds steadily without the salt load of synthetic products that can leave soil barren after repeated use. Work it in at the rate on the bag during spring and again midseason, then water it in deeply so the nutrients move down to the roots rather than running off the surface. Sowing a fall cover crop like clover or vetch and turning it under is a slower, longer-game way to rebuild tired soil, too.
Fix 3: Match Your Crops to the Temperature
Sometimes the plant isn’t sick — it’s just in the wrong weather. Vegetables planted out of sync with the temperature stall out, bolt, or drop their crop before it matures, no matter how well you water and feed. Cool-season crops like broccoli, cabbage, spinach, and carrots form their best heads and roots when soil and air stay below about 75°F; push them into a hot spell and the greens turn bitter and bolt to seed while the carrots come out skinny.
Warm-season crops want the opposite. Tomatoes, peppers, eggplant, squash, and beans hit their stride with nighttime lows above 60°F and daytime highs in the 80s. In cooler regions, starting these indoors in late winter gives transplants a head start so they’re not waiting on cold beds to warm up. If you garden where winters are mild, you get two cool-season windows — spring and fall — for lettuce, peas, kale, and beets, and those shoulder-season crops often hand you the crispest, biggest yields of the whole year.
The fix here is mostly planning. Look up your average last and first frost dates, choose seed varieties rated for your USDA hardiness zone, and sow each crop in its proper window. If your in-ground beds run hot or cold at the wrong times, containers give you a way to cheat — you can move them into sun or shade as the season turns. I keep a running list of vegetables that grow well in containers, and for tight spots my notes on the best container plants for urban balconies can help you make the most of a sunny rail or patio.
Fix 4: Mulch to Hold Moisture and Protect Roots
Bare soil is a quiet saboteur. Left exposed to sun and wind, it crusts over, sheds water before roots can drink it, and drives the worms and microbes you’re trying to encourage down deep, away from the root zone where they do their work. Plants then have to fight just to reach the minerals locked in the soil. A lot of “mystery” stunting clears up once the ground is covered.
A two-to-three-inch layer of organic mulch fixes a surprising amount at once. It slows evaporation so your watering goes further, insulates roots against sudden temperature swings, suppresses the weeds that steal nutrients, and feeds the bed as it breaks down. Compost, leaf mold, straw, and grass clippings all make good mulches. Just pull the material back an inch or two from the stems so the bases stay dry and don’t rot.
One thing to skip: fresh wood chips in a vegetable bed. As they break down they temporarily pull nitrogen out of the soil — exactly the nutrient your leafy crops are reaching for — so save them for paths and perennial borders. Top up your beds with compost or chopped leaves instead, and you’ll get the moisture-holding benefit without robbing the plants. If you’re still working in heavy, compacted ground, switching to a raised bed solves the structure problem from the start — my walkthrough on how to build a raised garden bed covers the basics.
Fix 5: Stay Ahead of Pests and Disease
Finally, pests and disease can stall a vigorous garden right before harvest. Sap-suckers like aphids, thrips, and spider mites latch onto tender growth and quietly drain it, while caterpillars chew through leaves and fruit. Fungal troubles — powdery mildew, leaf spots, root rot — tend to flare in crowded, damp beds with poor airflow, and they hit hardest when plants are already stressed from drought, heat, or hunger. So the first five fixes are, in a real sense, your best disease prevention.
Beyond keeping plants healthy, a few habits keep the pressure low. Space and thin your rows so air moves freely around every plant. Pull weeds promptly so they’re not competing for water and nutrients. Invite the good bugs — ladybugs, lacewings, hoverflies, and parasitic wasps — by letting a few flowers bloom at the bed edges; they’ll hunt your pests for free. A firm morning blast of water from the hose knocks aphids and mites off before they multiply.
When disease does show up, look for the environmental trigger before you reach for a spray. Rotate your crops each year so soil-borne pathogens don’t build up, thin out crowded foliage, and water at the soil line rather than over the leaves. For a stubborn case, snip off the infected leaves and carry them away from the garden rather than composting them. Most years, a tidy, well-spaced, well-fed bed simply doesn’t give disease much of a foothold.
Recommended gear for rescuing stunted vegetables
As an Amazon Associate, Backyard Superstar earns from qualifying purchases at no extra cost to you.
- Top pick — Raindrip Automatic Watering Kit ($$). Puts steady moisture on a timer — the fix for the #1 cause of stunting.
- Budget watering — Rocky Mountain Goods Flat Soaker Hose ($). Weeps water at the roots along the whole row, leaves dry.
- Diagnose the soil — Luster Leaf Rapitest Soil Test Kit ($). Checks pH and N-P-K so you feed on purpose, not by guess.
- Read the moisture — XLUX Soil Moisture Meter ($). Tells you if the root zone is truly dry or just dry on top.
- Feed the bed — Jobe’s Organics Vegetable & Tomato Fertilizer ($$). Organic granular feed that works in spring and midseason.
FAQ
Why are my vegetable plants so small and stunted?
Stunted vegetable plants almost always come down to one of five things: uneven watering, depleted soil nutrients, the wrong temperature for the crop, bare unmulched soil, or pests and disease. Check moisture and soil nutrients first, since those are the most common culprits, then work through the rest.
Can a stunted vegetable plant recover and still produce?
Often, yes — especially if you catch it early in the season. Correcting the underlying cause (usually water or nutrients) lets the plant put on new growth and set a crop before summer heat or fall frost arrives. Plants that are severely root-bound, diseased, or far past their season are better replaced.
How much should I water vegetables to prevent stunting?
Aim for steady, even moisture rather than frequent light sprinkles. Most beds want one or two deep soakings a week that wet the whole root zone, with the top inch allowed to dry slightly in between. Hot spells call for more. A soaker hose or drip kit on a timer keeps it consistent.
Will adding fertilizer fix stunted plants?
Only if a nutrient shortage is the actual problem — which is why a quick soil test is worth doing first. If the test shows a deficiency, an organic granular feed worked into the soil helps. If the real issue is water, temperature, or compacted soil, more fertilizer won’t help and can even add stress.
Does mulch really make a difference for vegetable growth?
A lot. A two-to-three-inch layer of organic mulch holds moisture, steadies soil temperature, suppresses competing weeds, and feeds the soil as it breaks down. Just keep it pulled back from plant stems, and avoid fresh wood chips in vegetable beds because they temporarily tie up nitrogen.