Backyard Obstacle Course Maintenance Checklist
A backyard obstacle course needs ongoing care to stay safe. Skip the maintenance and a fun afternoon turns into a scraped knee, a snapped rope, or a structural failure mid-climb. The good news: keeping a course in shape takes maybe two hours a month and a few hundred dollars a year. This guide covers the monthly inspection checklist, the seasonal care calendar, cleaning and surface repair, rust prevention on metal, and the tools you actually need for routine fixes.
The Maintenance Calendar at a Glance
A simple recurring schedule prevents almost all serious safety issues. Stick this on the inside of a shed door or save it in your phone.
| Cadence | Task | Time |
|---|---|---|
| Weekly (during use season) | Visual walk-through, look for loose bolts and frayed rope | 5 minutes |
| Monthly | Tighten all hardware; check rope tension and condition | 30 minutes |
| Quarterly | Pressure-wash all surfaces; spot-check fasteners | 1–2 hours |
| Semi-annual (spring + fall) | Apply rust inhibitor to metal; reapply wood sealant as needed | 2–3 hours |
| Annual (spring) | Full safety check, replace worn rope/chains, top up surfacing | 3–4 hours |
| Seasonal (storm + winter) | Cover or store removable components | 30 minutes |
The whole schedule adds up to about 25 hours per year — call it a half hour per week averaged across the year. Compared to the cost of replacing the course or treating an injury, that’s a small ongoing investment.
For courses still being built or planned, the backyard obstacle course building guide covers initial construction. Maintenance starts the day the course is finished.
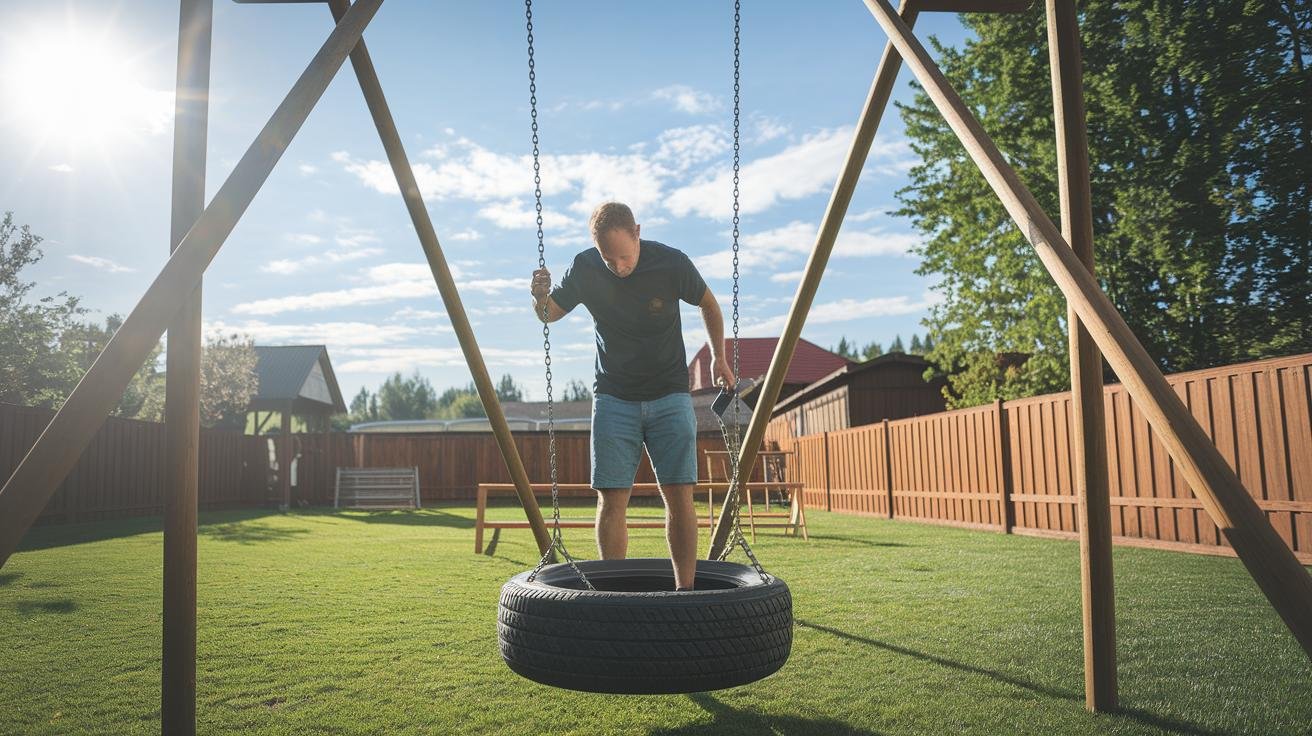
Monthly Safety Inspection Checklist
Run through this checklist on the first weekend of each month during use season. Cross items off as you go — written records help you spot patterns (one corner that keeps loosening, one rope that wears faster than others).
- Tighten every bolt. Socket wrench on every accessible fastener. Outdoor structures loosen through freeze-thaw cycles, temperature shifts, and repeated load. A loose bolt that’s still in place is a near-miss; a missing bolt is a failure.
- Check rope condition. Run a hand along every rope from end to end. Look for fraying, mildew, sun-bleaching at high points, and any spot where the core feels different (often signals internal damage). Replace anything questionable — rope is cheap, falls aren’t.
- Inspect chains and metal connectors. Check each link for cracks, rust, or wear. Use a magnet on suspect spots — rusted-through metal won’t hold a magnet the same way solid metal does.
- Look at every weld and joint. Cracks, fatigue lines (thin split marks), or visible bending all signal a joint that’s stressed. Welded joints fail by cracking near the weld, not in the middle of the bead.
- Push laterally on every vertical post. Rocking means anchoring is failing — usually a footing issue. Anchored posts in concrete shouldn’t move at all under firm pressure.
- Check wood for rot and splinters. Probe ground-contact areas with a screwdriver — soft spots indicate rot. Sand or replace any splintered surface kids will grip. Pay extra attention to wood at the base of posts where moisture pools.
- Examine all surfacing. Top up rubber mulch or wood fiber to maintain required depth across the fall zone. Bare spots near high-use obstacles are the most common surfacing failure.
Anything you can’t fix on the spot, mark with bright tape and take the obstacle out of use until repaired.
Cleaning and Surface Repair
Routine cleaning extends the life of every material significantly. Mud, mildew, and sap that sit on surfaces accelerate damage to wood and degrade ropes.
Quarterly pressure wash. A 2,000 PSI pressure washer at medium fan setting handles most surfaces. Hold the nozzle 12–18 inches from the surface; closer angles can erode wood grain or chip powder coating. Work top-down so debris washes off rather than sticking to lower surfaces.
For tough mildew or moss. Mix 1 cup oxygen bleach (sodium percarbonate, sold as Oxi-Clean and similar) per gallon of water. Spray on, let sit 15 minutes, scrub with a stiff brush, rinse with the pressure washer. Avoid chlorine bleach on wood — it discolors and weakens fibers.
For sap or sticky residue. Mineral spirits on a rag for wood; isopropyl alcohol or Goo Gone for plastic and powder-coated metal. Always test on an inconspicuous spot first.
Wood surface repair. Sand splintered areas with 80-grit then 150-grit sandpaper. Treat exposed end grain with extra sealant — that’s where moisture infiltrates fastest. Replace any board with rot reaching more than 1/4 inch deep; surface treatment doesn’t fix rotting cores.
Plastic surface repair. Stress cracks in plastic components can sometimes be stopped with a drilled “stop hole” at each end of the crack, but cracked plastic usually needs full replacement. Slides with cracks in the run surface should be retired immediately — the crack will catch a foot.
Powder coating repair. Sand the chipped area with fine grit, wipe clean, and apply manufacturer’s touch-up paint or a quality outdoor enamel. Multiple thin coats hold better than one thick coat. For #1035 covers the material specs for replacement parts in detail — see the obstacle course materials guide.
Seasonal Care Through the Year
Each season has its own maintenance focus. Hit each one and the course stays ready for use year-round in mild climates and recovers quickly in seasonal climates.
Spring opening. The big one. Full safety inspection after winter dormancy. Tighten every bolt, replace any hardware showing rust, inspect every rope and chain, top up fall-zone surfacing to required depth. Reapply wood sealant where last year’s coat has worn through. Check that all swing chains and ropes are reattached if removed for winter.
Summer active use. Weekly visual checks, quick rinse-downs after dusty or pollen-heavy weeks. Watch for loose bolts after weekend heavy-use sessions. Brush sap off plastic slides before it bakes on. Apply UV-blocking sealant to any wood that gets afternoon sun if you didn’t in spring.
Fall close-down prep. Deep clean before winter. Apply rust inhibitor to all metal components. Apply fresh wood sealant if needed (or skip if you prefer the silvery patina on cedar). Remove rope swings, hammocks, and any fabric components for indoor storage. Disconnect anything not weather-resistant.
Winter storage and cover. In freezing climates, cover the structure with breathable tarps (not airtight plastic — that traps condensation and accelerates rot). Bring removable rope, chain, and fabric components inside. Brush snow off horizontal surfaces after storms to prevent ice load on plastic and weight stress on lower frame members. Skip the cover entirely if you’d rather let the structure weather naturally — many wood-frame courses do fine fully exposed.
After major storms. Inspect the whole course after any significant wind, hail, or heavy snowfall. Storms can shift footings, break weak rope, and bend metal frames. A 15-minute check after storms catches issues before kids use the course again.
Rust Prevention on Metal Components
Rust is the slow killer of any metal-frame obstacle course. Once it starts, it spreads — and rust on a structural connector progressively weakens the joint. Two-step prevention covers most installations.
Step 1: Stop water from sitting on metal. Wherever metal joints can hold water (corner pockets, bolt heads in horizontal positions, the inside of any tube or pipe), water sits and rust starts. Fixes: drill small drainage holes at low points, angle horizontal surfaces slightly so water sheds, and seal the inside of tubular components with a rust-preventive spray.
Step 2: Apply rust inhibitor. Semi-annually (spring and fall), spray exposed metal with a rust inhibitor. Cheap option: Rustoleum Rust Reformer or similar in a spray can ($8–$15). Better: Fluid Film or POR-15 for hidden surfaces that are hard to reach repeatedly. Apply to dry metal, not after rain.
When rust has already started:
- Surface rust (light orange film). Wire-brush off, wipe clean, apply rust inhibitor, then touch-up paint if cosmetic.
- Moderate rust (flaking, pitted). Wire-brush aggressively, sand to bright metal with 80-grit, apply rust-converter primer, then paint. Inspect the underlying metal — if pitting is deep, the structural integrity may be compromised.
- Heavy rust (rust-through, soft spots). Replace the component. Rusted-through metal can fail suddenly under load and shouldn’t be patched on safety-critical structures.
Stainless steel hardware on a powder-coated steel frame is the most rust-resistant common combination. For replacement hardware, the materials guide covers stainless and galvanized options in more detail.
Tools and Common Repair Fixes
Most maintenance needs nothing more than a small toolbox. Stock these and you can handle 90% of routine issues without a hardware store trip:
- Socket wrench set with imperial and metric sockets — for tightening every fastener.
- Adjustable wrench — for any oddball hardware the socket set doesn’t fit.
- Pressure washer (2,000 PSI works for residential use) — for quarterly deep cleaning.
- Wire brush — for rust removal on metal components.
- Sandpaper (80, 150, 220 grit) — for wood splinter repair and metal prep.
- Rope in matching diameter to your course — for quick rope replacement.
- Spare hardware kit — stainless lag bolts, eye bolts, carabiners, washers in common sizes.
- Outdoor wood sealant — for spot reseals between full annual coats.
- Rust inhibitor spray — for metal touch-up.
- Touch-up paint pen matching powder-coated colors — for chipped finishes.
Common repair walkthroughs:
Tightening a loose bolted joint: Use the right-sized socket, hand-tighten first to check that threads are clean, then snug with the wrench using even pressure. Stop when you feel resistance increase sharply — overtightening strips threads or splits wood. For wood-to-metal connections, use a washer under the bolt head to spread load.
Replacing a frayed climbing rope: Cut the old rope, measure twice, cut new rope 6 inches longer than needed for knot security. Use a double-overhand knot at each anchor point. Test by hanging your full body weight on the rope and bouncing gently before letting kids use it.
Repairing splintered wood: Sand the splinter area with 80-grit, then 150-grit, then 220-grit for smooth finish. Apply fresh sealant to seal the newly-sanded surface. If the splinter goes more than 1/4 inch deep into a structural member, plan to replace the board within the next maintenance cycle.
Touching up rust on powder coating: Sand the rusted area with fine grit until you reach bright metal. Wipe with mineral spirits to clean. Apply rust-converter primer (turns remaining rust into a stable surface). Apply two thin coats of matching touch-up paint, letting each dry per the can instructions.
For initial construction or major rebuilds, the backyard obstacle course building guide covers the full build process. For small-yard courses with different maintenance considerations, the small-yard design guide covers modular components that simplify maintenance access.
FAQ
How often should I inspect a backyard obstacle course?
Weekly visual walk-throughs during use season catch most obvious issues (loose bolts, frayed rope, missing surfacing). Monthly thorough inspections with a wrench in hand catch the rest. Plus a full spring opening inspection after winter dormancy. Total time: about 30 minutes a month plus a longer spring session.
What’s the most common obstacle course failure?
Loose hardware causing structural instability is the most common safety issue. Rope failure is second — usually from UV degradation or hidden core damage rather than visible fraying. Both are preventable with monthly inspection and timely replacement.
How often should I replace climbing rope on an obstacle course?
Replace any natural-fiber rope (manila, hemp) every 2–3 years regardless of how it looks — outdoor UV and moisture exposure degrades the core faster than the surface shows. Synthetic climbing rope (polypropylene, polyester) lasts 4–6 years outdoors. Replace any rope sooner if you see fraying, mildew, or a soft spot in the core.
Can I pressure-wash my obstacle course?
Yes, at 2,000 PSI on medium fan setting, holding the nozzle 12–18 inches from the surface. Closer ranges can erode wood grain or chip powder coating. Work top-down so debris washes off lower surfaces. Avoid pressure washing rope or fabric components — air-dry instead.
How do I keep metal frames from rusting?
Two-step prevention: stop water from sitting on metal (drill drainage holes at low points, angle surfaces to shed water) and apply a rust inhibitor spray semi-annually. For hardware, stainless steel or hot-dip galvanized resists rust significantly longer than zinc-plated. For frames, powder coating plus annual rust-inhibitor touch-ups handle most climates.
How do I store an obstacle course for winter?
Cover the structure with breathable tarps (not airtight plastic, which traps moisture). Bring removable components — ropes, swings, fabric tunnels — inside. Apply fresh rust inhibitor to metal before covering. In freezing climates, brush snow off horizontal surfaces after storms to prevent ice load. Some wood-frame courses do fine fully uncovered through winter if you’d rather skip the storage step.
What tools do I need for obstacle course maintenance?
Socket wrench set, adjustable wrench, pressure washer, wire brush, sandpaper, spare rope, spare hardware kit, outdoor wood sealant, rust inhibitor spray, and matching touch-up paint pen. Total cost for the kit: $150–$300. Stock this and you can handle 90% of routine issues without a hardware-store trip.
Is it worth maintaining an old obstacle course or should I rebuild?
Rebuild rather than maintain if the structural frame has rotted, the footings have shifted, or rust has caused structural pitting on load-bearing connectors. Maintain rather than rebuild if the frame is sound and only surface elements need replacement (rope, hardware, sealant, surfacing). Most well-built courses earn 5+ years of life past the point at which neglected courses become unsafe.