Easy Vegetables for Beginners to Grow from Seed
Have you ever thought about growing your own vegetables, but felt it was just too complicated? If so, you’re not alone! Gardening can seem daunting at first, but starting with the right vegetables can make all the difference. As a beginner, you want to choose vegetables that are not only easy to grow but also quick to reward your efforts.
Imagine walking into your backyard on a sunny morning and picking fresh, crisp radishes or tender lettuce leaves for your lunch—all grown by your own hands in just a few weeks! That feeling of accomplishment is within your reach. In this guide, I’ll walk you through everything you need to know about growing vegetables that are perfect for beginners, setting you up for gardening success without the stress.
Top Easy Vegetables to Grow from Seed
Growing vegetables from seed is one of the most rewarding experiences in gardening, especially for beginners. Not only is it more cost-effective than buying seedlings, but it also gives you a wider variety of plants to choose from. Let’s explore some vegetables that practically grow themselves!
1. Radishes: The Speedy Starter
Radishes are the sprinters of the vegetable world, maturing in just 3-4 weeks. This makes them perfect for impatient gardeners or for gardening with children who love to see quick results. They’re also incredibly versatile in the kitchen—add them to salads for a peppery crunch, roast them for a milder flavor, or pickle them for a tangy treat.
Growing tip: Sow radish seeds every two weeks for continuous harvests throughout the growing season. This technique, called succession planting, ensures you’ll never have too many radishes at once.
2. Lettuce: The Year-Round Wonder
Lettuce is amazingly versatile and offers continuous harvests. Simply snip the outer leaves and let the plant continue growing—this “cut and come again” method provides fresh greens for weeks from a single planting. With countless varieties like butterhead, romaine, and loose-leaf, you can create a salad garden with different colors, textures, and flavors.
Growing tip: In hot summer months, provide some afternoon shade to prevent lettuce from becoming bitter and bolting (flowering too quickly).
3. Carrots: The Underground Treasure
Few things beat the satisfaction of pulling a perfect carrot from the soil. While they take a bit longer than radishes (about 70-80 days), they’re still quite simple to grow. Beyond the classic orange varieties, try growing purple, yellow, or even white carrots to add excitement to your garden and plate.
Growing tip: Mix carrot seeds with sand before sowing to prevent overcrowding, as this makes it easier to spread the tiny seeds evenly.
4. Spinach: The Nutrient Powerhouse
Spinach thrives in cooler weather and partial shade, making it perfect for spring and fall gardens. It’s packed with nutrients and can be harvested when the leaves are small and tender for baby spinach or left to grow larger for cooking. Fresh spinach from the garden has a much richer flavor than store-bought varieties.
Growing tip: Plant spinach alongside taller plants like tomatoes or corn in summer to provide natural shade, extending your spinach season.
5. Bush Beans: The Abundant Producer
Bush beans are compact, productive plants that don’t require support like pole beans do. They typically produce all at once, giving you a generous harvest for fresh eating, freezing, or canning. Green beans aren’t the only option—try yellow wax beans or purple varieties that turn green when cooked.
Growing tip: Harvest beans frequently to encourage more production—the more you pick, the more the plant will produce!
By starting with these easy-to-grow vegetables, you’ll build confidence while enjoying the process of growing your own food. These varieties offer a perfect balance of quick growth and minimal maintenance, making your first gardening experience a positive one.
Planting Tips for Easy Seed Vegetables
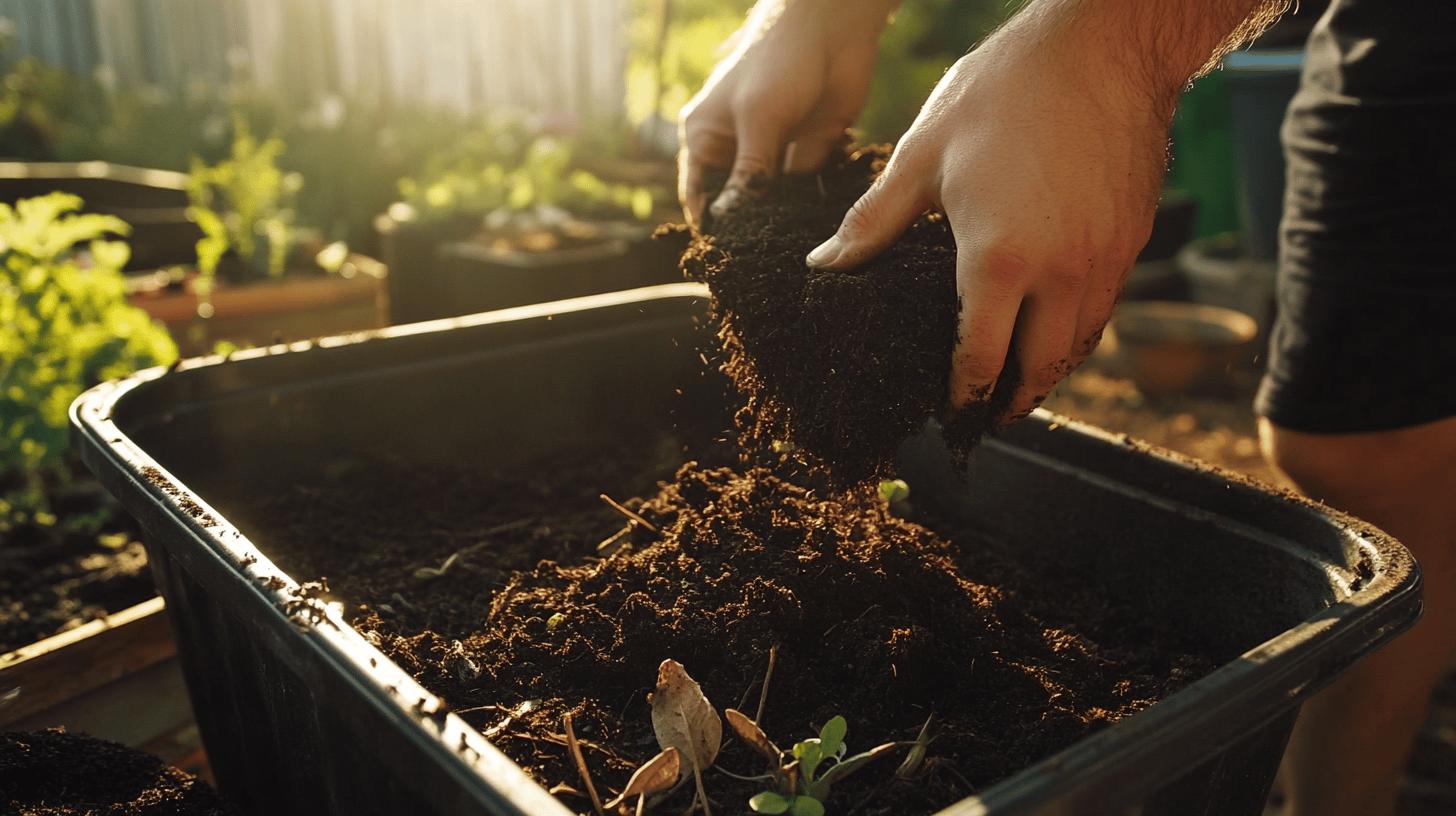
Preparing Your Soil: The Foundation of Success
Think of soil as the foundation of your home—if it’s not solid, the whole structure suffers. Good soil preparation is absolutely essential for a thriving garden. Here’s how to get your soil in top shape:
- Loosen the soil to a depth of at least 6-8 inches using a garden fork or tiller. This improves root growth and water absorption, giving your plants the best chance at establishing themselves.
- Remove weeds thoroughly, including their roots. Weeds are the unwelcome dinner guests of the garden world—they’ll gladly consume the nutrients meant for your vegetables.
- Add compost to improve soil fertility. Whether store-bought or homemade, compost adds essential nutrients and beneficial microorganisms that help plants thrive. Aim to incorporate 2-3 inches of compost into your soil before planting.
- Test your soil pH using an inexpensive kit from your local garden center. Most vegetables prefer a slightly acidic to neutral pH (6.0-7.0). If needed, add lime to raise pH or sulfur to lower it based on your test results.
Pro tip: Save yourself future work by laying down newspaper or cardboard topped with compost or mulch in pathways between garden beds to suppress weeds throughout the season.
Planning Your Garden Layout: A Place for Everything
A thoughtful garden layout makes maintenance easier and plants happier. Consider these factors:
- Sunlight patterns across your yard throughout the day. Most vegetables need at least 6 hours of direct sunlight, but some, like lettuce and spinach, appreciate afternoon shade in hot climates.
- Plant height matters—tall plants like corn or sunflowers can shade shorter plants, so place them on the north side of your garden to prevent unwanted shade.
- Group plants with similar water needs together to make watering more efficient and prevent overwatering or underwatering certain plants.
- Accessibility is key—make sure you can reach all plants for harvesting without stepping on garden beds, which compacts the soil.
Here’s a handy reference table for the vegetables we’ve discussed:
| Vegetable | Sunlight Requirements | Soil Type | Spacing Between Plants | Days to Maturity |
|---|---|---|---|---|
| Radishes | Full Sun | Well-Drained | 1-2 inches | 21-28 days |
| Lettuce | Partial Shade | Rich, Moist | 6-8 inches | 45-60 days |
| Carrots | Full Sun | Loose, Sandy | 2-3 inches | 70-80 days |
| Spinach | Partial Shade | Rich, Well-Drained | 3-5 inches | 40-45 days |
| Bush Beans | Full Sun | Average Garden | 4-6 inches | 50-60 days |
Watering and Light Requirements for Growing Vegetables
Smart Watering Practices
Water is life for your garden, but how and when you water makes all the difference. Follow these guidelines for healthier plants:
Morning watering is best, ideally between 5-9 AM. This gives plants time to dry before evening, reducing disease risks. If morning isn’t possible, late afternoon is your next best option, but avoid wetting the leaves if you water in the evening.
Water deeply but less frequently to encourage deeper root growth. Light, frequent watering leads to shallow roots that make plants more vulnerable to drought. Aim for about 1-1.5 inches of water per week, including rainfall.
Mulch is your secret weapon for water conservation. A 2-3 inch layer of organic mulch like straw, shredded leaves, or compost around plants helps:
- Keep soil moisture consistent
- Suppress weeds that compete for water
- Regulate soil temperature
- Add nutrients as it breaks down
Use drip irrigation or soaker hoses whenever possible. These deliver water directly to the soil where it’s needed, reducing water waste from evaporation and keeping foliage dry to prevent disease.
Pro tip: The finger test is a reliable way to check if plants need water. Stick your finger about 2 inches into the soil—if it feels dry at that depth, it’s time to water.
Understanding Light Requirements
Light is plant food—it powers photosynthesis, which transforms light energy into the sugars plants need to grow. Each vegetable has specific light preferences:
Full sun lovers (6+ hours of direct sunlight daily):
- Radishes
- Carrots
- Bush beans
- Tomatoes
- Peppers
- Cucumbers
Partial shade tolerant (4-6 hours of direct sunlight):
- Lettuce
- Spinach
- Kale
- Asian greens
- Herbs like parsley and cilantro
If your garden has limited sunlight, focus on growing the partial shade tolerant vegetables for the best results.
Indoor Growing Solutions
Don’t let lack of outdoor space stop you from growing vegetables! With the right lighting, you can grow many vegetables indoors:
- LED grow lights provide the full spectrum that plants need for photosynthesis. They’re energy-efficient and don’t generate much heat, making them safer than older lighting options.
- Position lights correctly – keep them 6-12 inches above seedlings, gradually raising them as plants grow. Most vegetables need 14-16 hours of light per day when grown indoors.
- Rotate plants regularly to ensure all sides receive equal light, preventing plants from leaning or growing unevenly.
For indoor success, start with compact vegetables like leaf lettuce, spinach, microgreens, and herbs. These grow well in containers and don’t require as much light as fruiting plants like tomatoes or peppers.
Troubleshooting Common Issues in Vegetable Growing
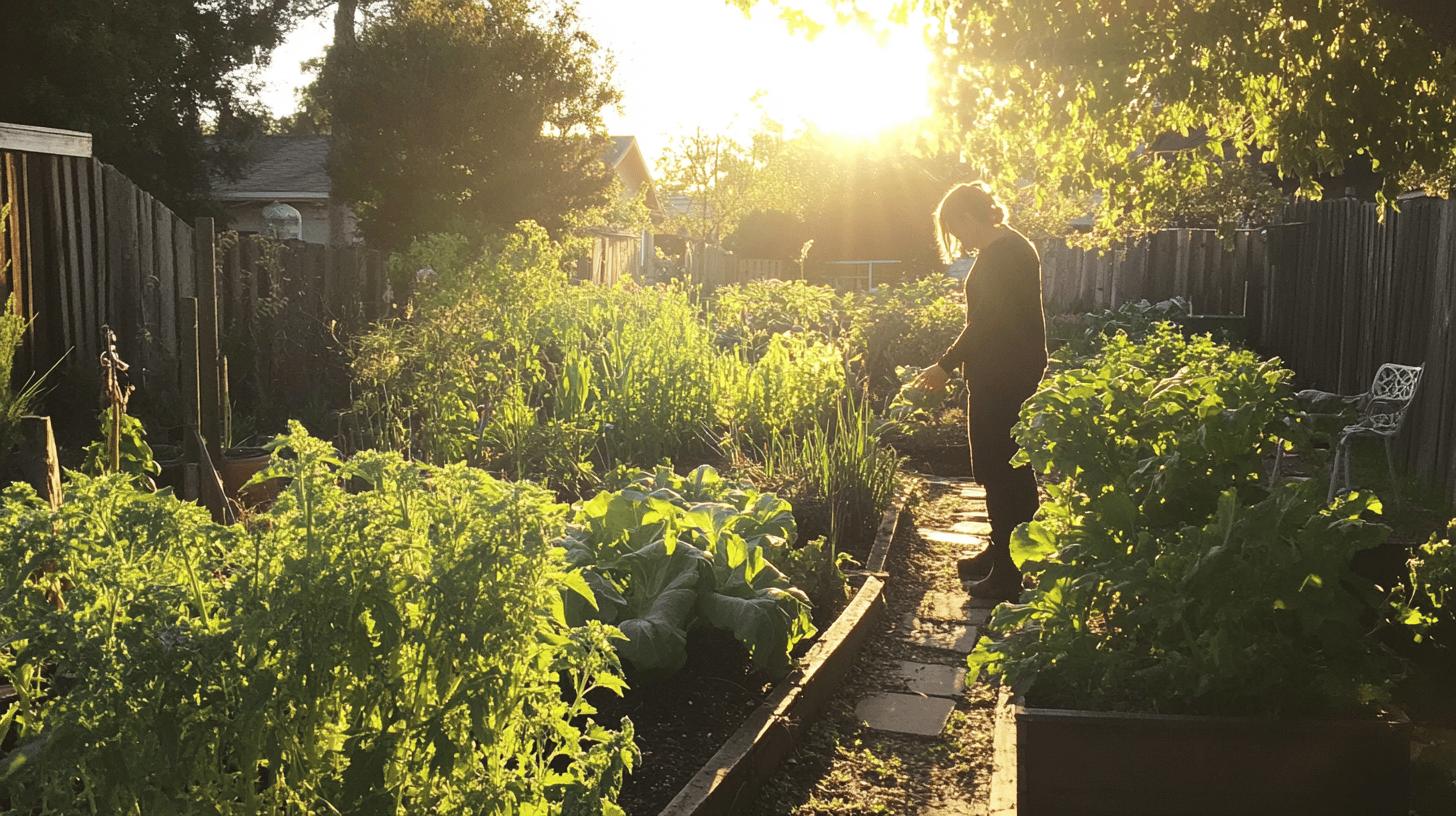
Even experienced gardeners face challenges. Learning to identify and solve common problems will save your harvest and build your gardening skills.
Common Beginner Mistakes and Solutions
Overwatering is arguably the most common mistake new gardeners make. Plants need oxygen around their roots as much as they need water, and waterlogged soil pushes out that vital oxygen, leading to root rot and plant death.
Solution: Before watering, check soil moisture by inserting your finger about an inch into the soil. If it feels moist, hold off on watering. Yellow leaves can be a sign of overwatering—if you see this symptom, reduce watering frequency.
Insufficient light causes plants to become “leggy”—they stretch toward light sources, resulting in weak, spindly stems and poor production.
Solution: If you notice plants stretching or producing smaller-than-expected leaves, they need more light. Either move containers to a sunnier spot or thin out nearby plants that might be creating shade.
Overcrowding happens when plants are spaced too closely together. This reduces air circulation (increasing disease risk) and creates competition for water and nutrients.
Solution: Follow spacing guidelines on seed packets, and be brave about thinning seedlings. Those extra radish or lettuce seedlings can often be added to salads as microgreens, so thinning doesn’t mean wasting.
Dealing with Common Garden Pests
Garden pests are inevitable, but many can be managed without harsh chemicals:
Aphids are tiny sap-sucking insects that cluster on new growth and the undersides of leaves. They reproduce rapidly but are easy to control if caught early.
Solution: A strong spray of water can dislodge aphids. For larger infestations, mix 1 tablespoon of mild dish soap with 1 quart of water and spray affected areas. Ladybugs and lacewings are natural aphid predators—welcome these beneficial insects to your garden!
Slugs and snails feed at night, leaving irregular holes in leaves and shiny slime trails.
Solution: Hand-pick them during evening garden walks (using a flashlight), or create barriers around vulnerable plants using crushed eggshells, diatomaceous earth, or copper tape. Shallow dishes of beer also make effective traps.
Cabbage worms are green caterpillars that blend in with leaves, making them hard to spot until you notice the damage.
Solution: Cover susceptible plants like cabbage, broccoli, and kale with floating row cover. Regularly inspect plants and remove caterpillars by hand, or spray with Bacillus thuringiensis (Bt), a natural bacteria that only affects caterpillars.
Preventing and Managing Plant Diseases
Prevention is much easier than cure when it comes to plant diseases:
Powdery mildew appears as a white, powdery coating on leaves and stems, commonly affecting squash, cucumbers, and peas.
Solution: Improve air circulation by proper plant spacing. A spray of 1 part milk to 9 parts water can help prevent and treat mild cases. For severe cases, look for organic fungicides containing potassium bicarbonate.
Root rot causes plants to wilt despite moist soil and leads to darkened, mushy roots.
Solution: Ensure proper drainage in garden beds and containers. Avoid overwatering and consider adding perlite or coarse sand to heavy soils to improve drainage.
Blossom end rot shows up as dark, sunken areas on the bottom of tomatoes, peppers, and squash.
Solution: This is caused by calcium deficiency, often due to inconsistent watering rather than lack of calcium in the soil. Maintain even soil moisture with regular watering and mulching. Adding crushed eggshells to the soil can provide additional calcium.
Remember that healthy plants resist pests and diseases better than stressed ones. Focus on building healthy soil, providing appropriate water and light, and monitoring your garden regularly to catch problems early.
Year-Round Vegetable Gardening for Beginners
One of the joys of vegetable gardening is that it doesn’t have to be limited to the spring and summer months. With some planning, you can harvest fresh vegetables throughout the year.
Extending Your Growing Season
Season extension techniques allow you to start earlier in spring and continue later into fall:
Cold frames are like mini-greenhouses—essentially a box with a transparent lid that captures solar heat. They can extend your growing season by 4-8 weeks on either end. You can build a simple cold frame using old windows or clear plastic sheeting over a wooden frame.
Row covers made of lightweight fabric provide several degrees of frost protection while allowing light, air, and water to reach plants. They’re perfect for protecting early spring plantings or extending the fall harvest of cool-season crops.
Hoop houses (small unheated greenhouses) can be built inexpensively using PVC pipe and plastic sheeting. They provide more growing space than cold frames and can maintain temperatures warm enough for cool-season crops all winter in many climates.
Hot caps are individual plant protectors made from plastic or waxed paper. Place them over newly transplanted seedlings to protect from late frosts and create a warmer microclimate.
Sustainable Gardening Practices
Sustainable gardening builds healthy soil and reduces the need for external inputs over time:
Crop rotation prevents soil depletion and reduces pest and disease buildup. Divide vegetables into families (such as legumes, brassicas, nightshades, and root crops) and avoid planting the same family in the same location for 3-4 years.
Cover crops like clover, buckwheat, or winter rye can be planted in the off-season to add organic matter, fix nitrogen, suppress weeds, and prevent soil erosion. Simply turn them into the soil a few weeks before your next planting.
Companion planting takes advantage of plant relationships to enhance growth and deter pests. For example, plant basil near tomatoes to improve flavor and repel certain insects, or grow radishes alongside carrots to break up soil and mark rows (since carrots are slow to germinate).
Composting garden waste creates free, nutrient-rich soil amendment while reducing landfill waste. Even apartment dwellers can compost using worm bins or bokashi systems that fit under the kitchen sink.
Planning for Seasonal Changes
Understanding which crops thrive in each season helps you plan a year-round garden:
Spring (cool season): Plant peas, radishes, lettuce, spinach, and carrots as soon as soil can be worked.
Summer (warm season): When danger of frost has passed, plant tomatoes, peppers, cucumbers, beans, and squash.
Fall (cool season again): Around 8-10 weeks before first fall frost, plant a second round of cool-season crops like lettuce, spinach, kale, and radishes.
Winter: In milder climates, grow cold-hardy vegetables like kale, collards, leeks, and carrots that can withstand light frosts. In colder regions, focus on indoor microgreens or sprouts.
Creating a simple garden calendar marked with first and last frost dates for your area will help you time plantings perfectly. Remember that microclimates in your yard (areas that are warmer or cooler than average) can be used to your advantage for extending seasons.
Easy Vegetables to Grow in Containers and Small Spaces
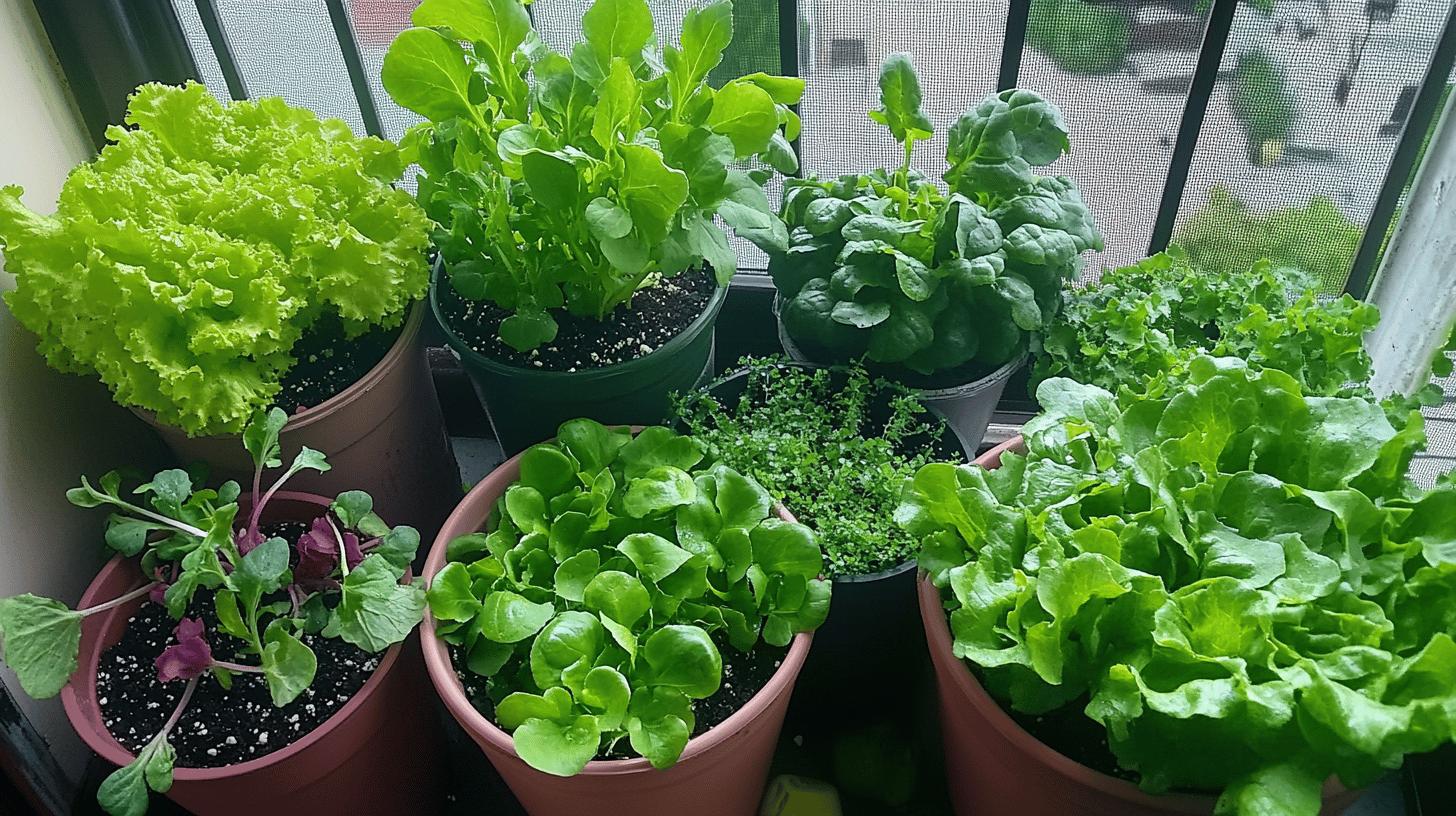
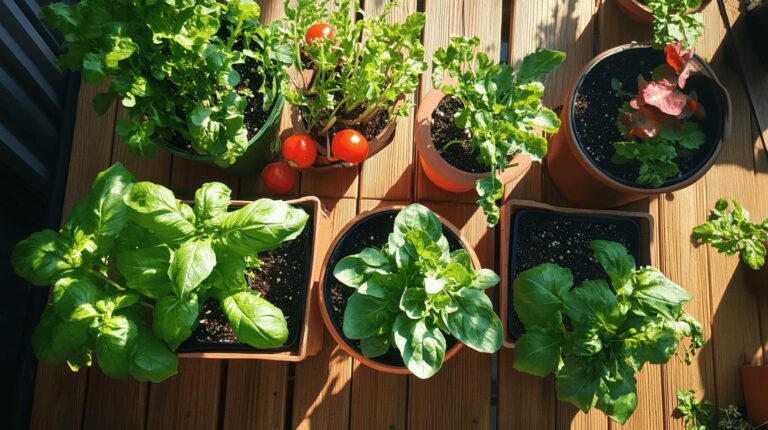
Limited space doesn’t mean limited growing options! Container gardening and vertical growing techniques make it possible to grow vegetables almost anywhere—from apartment balconies to tiny patios.
Container Gardening Essentials
The right containers and care make all the difference in container gardening success:
Choose containers wisely. While almost anything that holds soil can be a planter, ensure it has:
- Drainage holes (crucial for preventing root rot)
- Sufficient depth for the vegetable’s root system
- Food-safe materials if growing edibles (avoid treated wood or tires)
Use high-quality potting mix, not garden soil, in containers. Potting mix is lighter, drains better, and is free of weed seeds and soil-borne diseases. For vegetables, look for mixes labeled for edibles or add compost to regular potting soil.
Understand container sizes needed for different vegetables:
- Shallow roots (6-8″ depth): Lettuce, spinach, radishes, herbs
- Medium roots (8-12″ depth): Bush beans, peppers, chard
- Deep roots (12″+ depth): Tomatoes, carrots, potatoes
Water more frequently than in-ground gardens—containers dry out faster, especially during hot weather. Small containers may need daily watering during summer. Self-watering containers can make maintenance easier.
Fertilize regularly since nutrients in containers deplete quickly. Use a balanced organic fertilizer every 2-4 weeks during the growing season, or incorporate slow-release fertilizer when planting.
Vertical Gardening Techniques
Growing upward maximizes limited horizontal space:
Trellises and supports allow vining crops to grow vertically. Good climbers include:
- Pole beans
- Cucumbers
- Peas
- Small melons
- Indeterminate tomatoes
Wall-mounted planters create growing space on fences, walls, or railings. These work well for herbs, strawberries, and leafy greens.
Tiered planters provide multiple growing levels in the same footprint. Position taller plants on lower levels and shorter ones on top to ensure all receive adequate light.
Hanging baskets utilize overhead space. Cherry tomatoes, strawberries, and trailing herbs like thyme work well in hanging containers.
Tower gardens are vertical systems with planting pockets around a central support. These commercially available or DIY systems are excellent for growing many plants in a small footprint.
Creative Small-Space Solutions
Think outside the traditional garden bed with these innovative approaches:
Repurposed containers give new life to household items:
- Old barrels (cut in half) for deep-rooted vegetables
- Wooden crates for shallow-rooted plants
- Large food tins (with drainage holes) for herbs
- Broken wheelbarrows lined with landscape fabric
- Old rain boots for individual herb plants
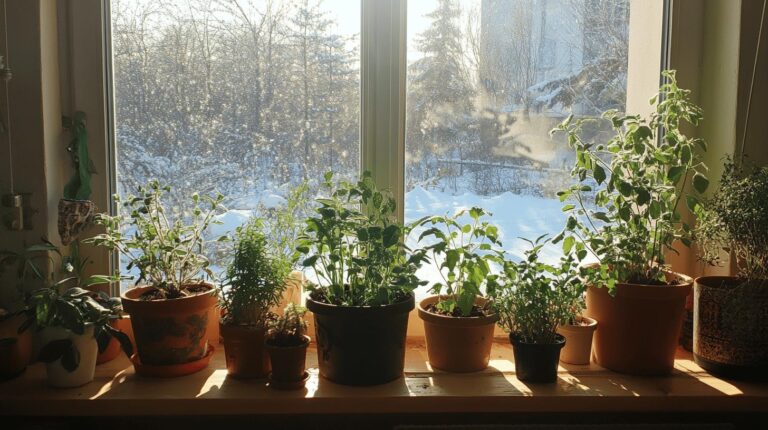
Window boxes aren’t just for flowers—plant leaf lettuce, spinach, radishes, and herbs for an edible windowsill garden.
Grow bags are fabric containers that promote healthy roots through “air pruning” and prevent plants from becoming root-bound. They’re also portable, allowing you to move plants to optimize sunlight.
Hydroponic systems grow plants in nutrient-rich water rather than soil. Simple DIY systems can be created from plastic totes, PVC pipe, or even plastic bottles for growing lettuce, herbs, and other leafy greens year-round indoors.
Remember that small-space gardens often benefit from choosing compact varieties specifically bred for containers. Look for terms like “bush,” “dwarf,” “patio,” or “container” in seed descriptions.
Best Practices for Seed Starting Success
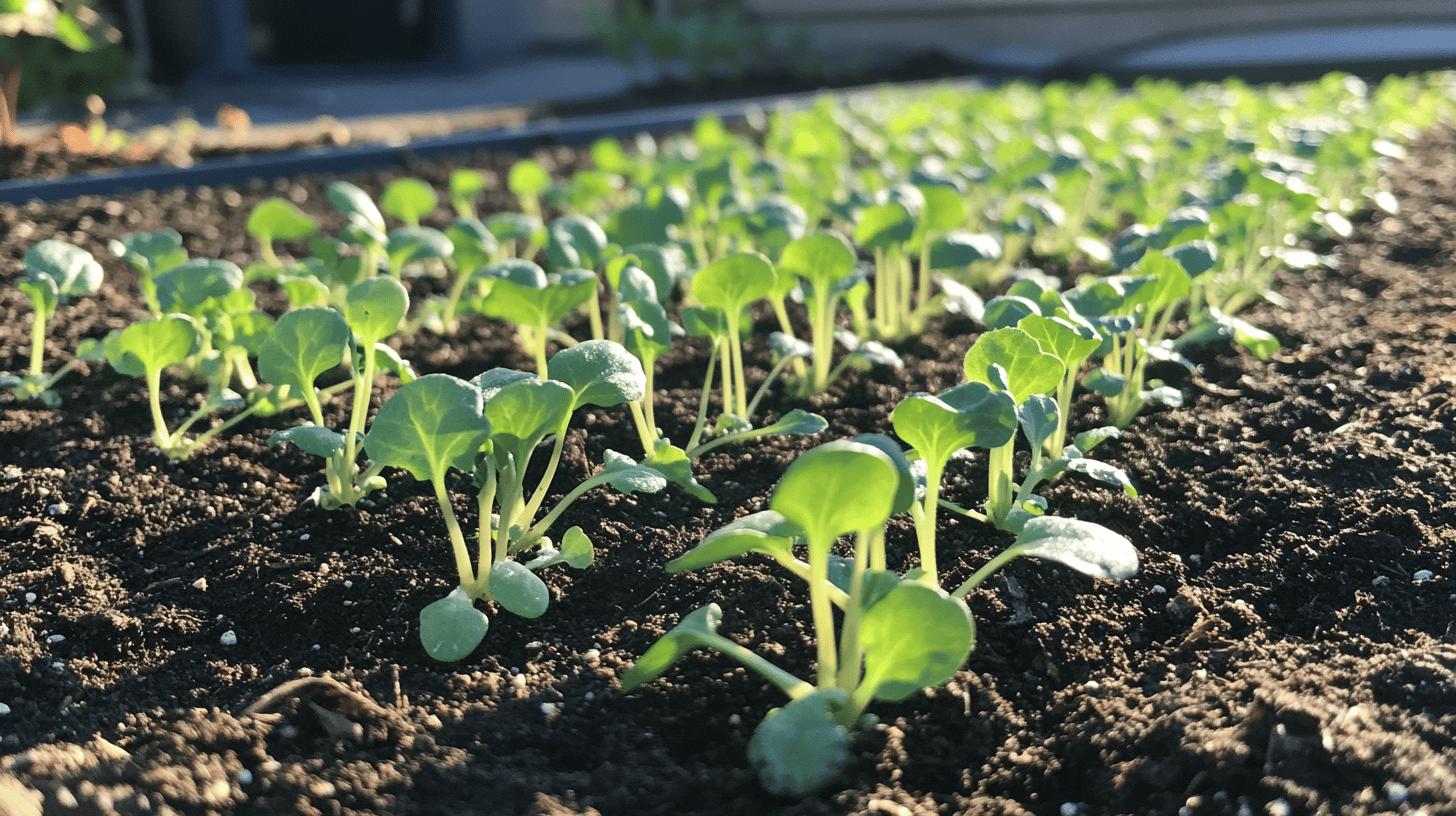
Starting your own seeds opens up a world of variety beyond what’s available as transplants at garden centers. With a few simple techniques, you can grow healthy seedlings ready for your garden.
Essential Seed Starting Tips
Follow these fundamentals for successful seed starting:
Choose the right seeds for your experience level and growing conditions. As a beginner, focus on easy-to-grow varieties with high germination rates. Consider your climate and growing season length when selecting varieties.
Use quality seed starting mix, not garden soil or regular potting soil. Seed starting mix is sterile, lightweight, and provides the perfect environment for germination. You can purchase pre-made mix or make your own by combining equal parts peat moss (or coco coir), perlite, and vermiculite.
Provide proper containers with drainage holes. Options include:
- Seed starting trays
- Biodegradable pots (peat or coir)
- Repurposed containers like yogurt cups (with holes punched)
- Soil blocks (compressed soil that holds together without containers)
Plant at the right depth—generally two to three times the seed’s width. Tiny seeds like lettuce barely need covering, while larger seeds like beans should be deeper.
Maintain consistent moisture—the soil should feel like a wrung-out sponge, never soggy or dry. Cover seed trays with a dome or plastic wrap until germination to retain moisture, removing the cover as soon as sprouts appear.
Label everything! Use waterproof markers or pencil on plant tags to record the variety name and planting date. This helps you track growth and learn which varieties perform best.
Indoor Seed Starting Advantages
Starting seeds indoors offers several benefits:
Extended growing season by starting plants weeks before outdoor planting is possible. This is especially valuable for vegetables with long growing seasons, like tomatoes and peppers.
Better germination control through consistent temperature and moisture conditions, resulting in higher success rates than direct sowing outdoors.
Stronger seedlings with controlled light, water, and temperature lead to healthier plants once transplanted.
Cost savings compared to buying transplants. A packet of seeds costs about the same as one or two seedlings from a garden center but provides dozens of plants.
Equipment for Successful Seed Starting
Basic equipment for indoor seed starting includes:
Lighting options: While sunny windows may seem convenient, they rarely provide sufficient light intensity or duration for strong seedlings. Better options include:
- Fluorescent shop lights with one cool and one warm bulb
- LED grow lights specifically designed for plants
- High-output T5 fluorescent fixtures
Position lights 2-3 inches above seedlings, raising them as plants grow. Provide 14-16 hours of light daily using a simple outlet timer.
Heat sources help maintain the ideal germination temperature (usually 65-75°F):
- Seedling heat mats placed under trays
- The top of a refrigerator or other warm spot
- Warm (not hot) sunny window during the day
Watering tools for gentle moisture:
- Spray bottles for misting
- Watering cans with fine “rose” attachments
- Self-watering trays with capillary mats
- Turkey basters for precise water delivery
Fans provide gentle air circulation, strengthening seedling stems and preventing fungal diseases. A small oscillating fan set on low near your seedlings for a few hours daily makes a noticeable difference.
Hardening off (gradually acclimating indoor-grown seedlings to outdoor conditions) is crucial before transplanting. Start with an hour of filtered sunlight, increasing exposure over 7-10 days until seedlings can handle full sun and wind.
Exploring Raised Bed and Container Gardening
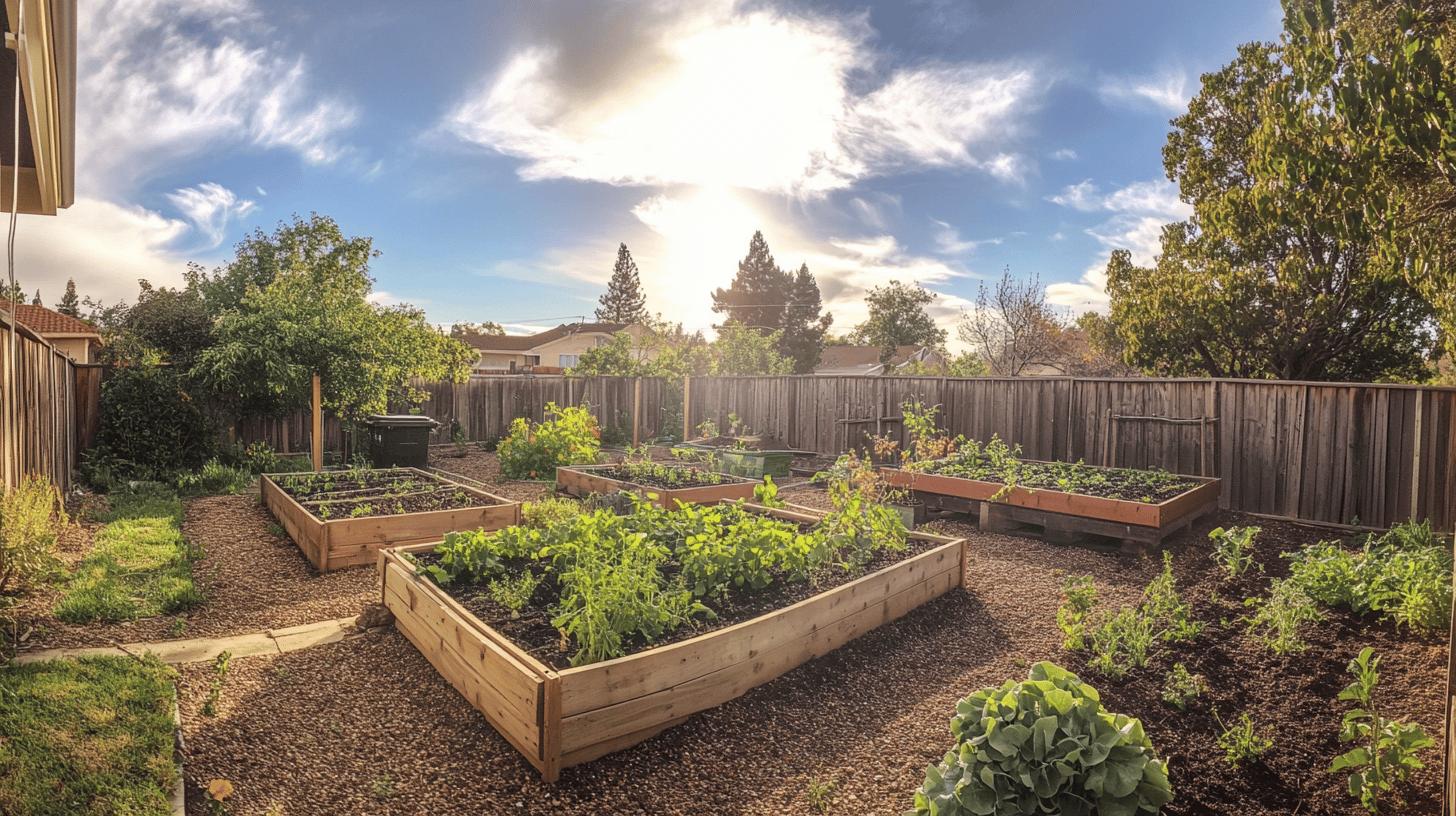
Raised beds and containers offer solutions to many common gardening challenges, making them ideal for beginners and experienced gardeners alike.
Benefits of Raised Bed Gardening
Raised beds offer numerous advantages that make gardening easier and more productive:
Improved soil conditions start with better drainage, which prevents waterlogging and allows earlier spring planting since raised beds warm up faster than ground soil. The contained area also makes it easier to amend soil to the perfect texture and nutrient content for your plants.
Reduced back strain comes from less bending—beds can be built at a height that minimizes stooping and kneeling. This makes gardening more accessible for people with mobility limitations or back problems.
Clearer boundaries between garden and non-garden areas mean fewer encroaching weeds and grass. Defined edges also create a tidier appearance in your landscape.
Higher yields in properly managed raised beds often exceed traditional row gardens because:
- Soil compaction is eliminated (you never walk on the growing area)
- Plant spacing can be tighter using intensive “square foot” gardening methods
- Better soil quality supports healthier plants
Extended growing seasons are possible because raised bed soil warms earlier in spring and stays workable later in fall. Adding hoops and row covers can further extend your growing season by several weeks.
Building Your First Raised Bed
Creating a simple raised bed is an achievable weekend project:
Choose materials that are safe and durable:
- Untreated cedar or redwood (naturally rot-resistant)
- Composite lumber made for garden use
- Concrete blocks (which also absorb heat to warm soil)
- Repurposed materials like old livestock water troughs
Size matters—aim for beds no wider than 4 feet so you can reach the center from either side without stepping in the bed. Length can vary based on your space, but 8-10 feet is manageable. Height should be at least 6 inches, though 10-12 inches is ideal for most vegetables.
Location considerations:
- Choose a spot receiving at least 6-8 hours of sunlight daily
- Orient beds north-south when possible for even sun exposure
- Place near a water source for convenient irrigation
- Allow enough space between beds for easy access with garden tools
Filling your raised bed with the right soil mix is crucial. A good basic recipe is:
- 60% topsoil
- 30% compost
- 10% perlite, vermiculite, or coarse sand for drainage
This creates a balanced growing medium with good structure, nutrition, and moisture retention.
Creative Container Options
Beyond standard pots, many unexpected items make excellent plant containers:
Repurposed household items:
- Old bathtubs or sinks
- Wooden dresser drawers (lined with plastic)
- Leaky watering cans or colanders (perfect for herbs)
- Worn-out wheelbarrows
- Large food cans (coffee cans, olive oil tins)
Natural materials:
- Half wine barrels
- Woven willow planters
- Log sections hollowed in the center
- Stone troughs
Industrial repurposing:
- Galvanized stock tanks
- Wooden shipping crates
- Metal buckets
- Old tool boxes
Whatever container you choose, ensure it has proper drainage and is safe for growing food. Line metal containers with landscape fabric to prevent soil contact with potentially treated metals, and avoid pressure-treated wood or containers that held toxic materials.
Choosing the Right Tools and Materials for Beginner Gardeners
Quality tools make gardening more enjoyable and efficient. You don’t need everything at once—start with the essentials and add as your garden grows.
Essential Tools for Every Gardener
These basic tools form the foundation of your gardening toolkit:
Hand trowel: This versatile tool is perfect for digging planting holes, transplanting seedlings, and working in containers. Look for one with a comfortable grip and sturdy construction where the blade meets the handle.
Pruners (hand pruners or secateurs): Used for harvesting vegetables, trimming plants, and cutting small branches. Bypass pruners (which cut like scissors) are best for live plant material, while anvil pruners (which cut against a flat surface) work well for dead wood.
Garden gloves: Protect your hands from blisters, thorns, and soil-borne organisms. Lightweight cotton gloves work for basic tasks, while leather or synthetic gloves offer more protection for tougher jobs.
Watering can: Choose one with a removable “rose” (the perforated end piece) that creates a gentle shower for seedlings. A 2-gallon size offers a good balance between capacity and weight when full.
Garden fork or broad fork: Essential for loosening compacted soil without disturbing soil layers. This is especially useful when preparing new beds or harvesting root crops.
Hoe: Helps with making seed furrows and controlling weeds. A stirrup hoe (also called a hula hoe) cuts weeds just below the soil surface with minimal soil disturbance, making it ideal for raised beds.
Tool Maintenance and Care
Properly maintained tools last longer and perform better:
Clean tools after each use by removing soil with a stiff brush or old towel. For sap or stubborn dirt, scrub with mild soapy water and dry thoroughly.
Prevent rust by wiping metal parts with an oiled cloth occasionally. A few drops of vegetable oil or specialized tool oil on a rag is all you need.
Sharpen cutting tools regularly—pruners, shears, and hoes work better and require less effort when sharp. Use a sharpening stone or file following the original bevel angle.
Store tools properly in a dry location, ideally hanging on a wall or stored in a bucket filled with sand mixed with a little oil to keep metal parts clean and rust-free.
Replace broken handles rather than discarding the entire tool. Many garden centers sell replacement handles for standard tools.
Choosing Quality Garden Materials
Beyond tools, these materials will help ensure gardening success:
Soil amendments improve your existing soil:
- Compost adds organic matter and nutrients
- Aged manure increases fertility (must be composted for at least 6 months)
- Peat moss or coco coir improves moisture retention
- Perlite or vermiculite increases drainage in heavy soils
Mulch options for different garden areas:
- Straw or shredded leaves for vegetable gardens
- Wood chips for paths and ornamental areas (avoid using fresh wood chips directly in vegetable beds)
- Living mulches like clover between rows reduce weeds while fixing nitrogen
Support structures help plants grow properly:
- Tomato cages or stakes
- Trellises for climbing plants
- Plant ties or soft twine for securing stems
Starting supplies for seeds and transplants:
- Seed starting mix
- Cell trays or pots
- Plant markers
- Liquid seaweed or fish emulsion for gentle fertilizing of seedlings
Record keeping materials help track garden progress:
- Garden journal or notebook
- Waterproof markers
- Garden planning software or apps
- Weather station for monitoring conditions
Investing in quality tools and materials from the beginning saves money in the long run and makes gardening more enjoyable. Start with the basics and expand your collection as your garden grows.
Final Words
Jumping into vegetable gardening can be both rewarding and simple with the right approach. From quick-growing radishes that provide almost instant gratification to the abundant harvests of bush beans, there’s a perfect vegetable for every beginner to enjoy success with.
We’ve explored how proper planning sets the foundation for gardening success—preparing your soil with compost, designing an efficient garden layout, and understanding the specific needs of different vegetables. Learning smart watering practices and light requirements ensures your plants have the basic elements they need to thrive.
Even when challenges arise, the troubleshooting tips we’ve covered will help you identify and solve common problems before they threaten your harvest. Whether you’re dealing with pests, diseases, or environmental stress, solutions are within your reach.
One of the most exciting aspects of vegetable gardening is its flexibility. Whether you have acres of land or just a small balcony, raised beds and containers offer ways to grow fresh food in almost any space. Vertical gardening techniques and creative repurposing of everyday items open up even more possibilities for urban and small-space gardeners.
Starting seeds indoors extends your growing season and allows you to try varieties you’ll never find as transplants at garden centers. With basic equipment and a little practice, you’ll be growing healthy seedlings ready for transplanting when conditions are right.
The right tools make any job easier, and gardening is no exception. Starting with quality essentials and maintaining them properly ensures they’ll serve you for many seasons to come.
As you embark on your vegetable gardening journey, remember that every experienced gardener was once a beginner. Each season brings new learning opportunities and achievements to celebrate. By starting with these easy-to-grow vegetables and applying the techniques we’ve discussed, your garden will flourish into a productive haven providing nutritious, delicious food for your table.
Happy gardening!
FAQ
What’s the easiest vegetable to grow from seed?
Radishes are the easiest vegetable to grow from seed. They mature incredibly quickly, within just 3-4 weeks, and require minimal care. Their large seeds are easy to handle, and they grow in almost any soil type, making them perfect for beginners and children.
What are the best easy vegetables for beginners?
For beginners, the best vegetables to start with include radishes, lettuce, spinach, bush beans, and carrots. These vegetables have straightforward growing requirements, are relatively pest-resistant, and provide reliable yields even with minimal experience.
What vegetables grow well in pots?
Many vegetables thrive in containers, including lettuce, radishes, bush beans, cherry tomatoes, peppers, and herbs like basil and parsley. Look for compact or “bush” varieties specifically bred for container growing. Ensure pots have good drainage and use quality potting mix rather than garden soil.
